
How to Make a Sourdough Starter
Want to bake sourdough bread? First, you need a sourdough starter! This step-by-step guide will walk you through the process so you can get started with confidence. Spoiler alert: it’s easier than you think!
Making your own starter means you’ll always have natural yeast on hand. It adds incredible flavor and texture to bread and can be used in tons of other recipes beyond bread, too!
If you have a bunch of questions, make sure you read my Beginners Guide to Sourdough for all the answers!
A sourdough starter is a live culture made from just flour and water. It captures wild yeast and bacteria from the air and flour, allowing your bread to rise naturally. Think of it as a low-maintenance pet—feed it, take care of it, and it will reward you with amazing bread!
Making your own starter means you’ll always have natural yeast on hand. It adds incredible flavor and texture to bread and can be used in tons of other recipes beyond bread, too!
What you need:
Before you start, you need these items on hand:
- Flour (Whole wheat is best for starting)
- Water (Filtered or tap water that’s chlorine-free.)
- A Jar (A mason jar or any glass container.)
- A Spoon or Spatula (For stirring.)
- A Cloth or Lid (To cover your jar loosely.)
Why whole wheat flour? We are going to start with whole wheat flour, because whole grain flour tends to have a more rich environment for the wild yeast than all purpose. It will help jump start the process. After that you can choose to continue feeding with the whole wheat flour or switch to unbleached all purpose flour. If you don’t have whole wheat flour, you can use unbleached all purpose, too, it just might take a little longer to get going.
*Note: You can use the same process to create a starter with rye or spelt flour. Because whole grain flours absorb more water than all purpose water, you will need to adjust the amount of water you use to create a consistency that is like a muffin batter.
How to Make a Sourdough Starter
Here are simple step by step instructions for creating your own sourdough starter.
- Prep Time: 7 days
- Total Time: 168 hours
- Yield: 1 Starter 1x
- Category: Basics
- Method: Mix
- Cuisine: American
Ingredients
- 1 bag whole wheat flour
- 1 bag unbleached all purpose flour
- Filtered or Tap water if its chlorine and chloramine free!. Bottled water also works, but do not use distilled water.
Instructions
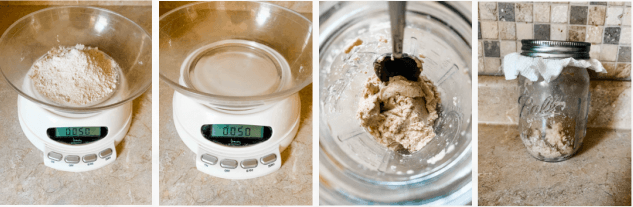
- Day One: Start with a clean glass jar. I like to use a mason jar because its easy and cheap. Add 50 grams of water and 50 grams of whole wheat flour to your jar and stir well to combine. It should be like a thick paste. Cover it with a breathable top (like a clean old t-shirt or fabric scrap) and use the ring that came with the mason jar to screw it on. Place the jar in a place that is warm (70 – 75 degrees F) and leave it for 24 hours.
- Day Two: After 24 hours, add an additional 50 grams of whole wheat flour and 50 grams of water. Stir it well, scrape down the sides of the jar, re-cover, and set aside.
- Day Three: Add an additional 50 grams of whole wheat flour and 50 grams of water. Stir well, scrape down the sides, re-cover and set aside. You might see a few bubbles start to form in an hour or so, and that’s good! If not, that’s ok, too.
- Day Four: Remove 25 grams of your starter mixer from the jar. The remaining starter needs to end up in the trash (do not put it down the sink, it will dry into a cement-like glob that will clog your drains). To that 25 grams, add 50 grams of flour and 50 grams of water. Stir well, scrape the sides of the jar down, re-cover and set aside.
- Day Five: Add an additional 50 grams of flour and 50 grams of water. Stir well, scrape down the sides, re-cover and set aside.
- Day Six: Add an additional 50 grams of flour and water. Stir well, scrape down the sides, re-cover and set aside.
- Day Seven through Fourteen: Continue removing half of your discard and feeding it with 50 grams of flour and water. Stir well. At this point, your starter should start to have some good activity to it – you should be seeing bubbles, and it could even be doubling at this point. You now need to move to feeding it twice a day (every 12 hours)
- Day Fourteen and beyond: Congratulations! You now have a sourdough starter that is ready to use! Start baking!
How to store your starter:
I cover this more in my post on how to feed a sourdough starter, but basically:
- On the Counter: Feed daily if you bake often.
- In the Fridge: Feed once a week if you bake less frequently.
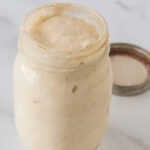
How do you know when your starter is ready?
A mature starter (10-14 days old) will be bubbly, double in size after feeding, and smell pleasantly yeasty. That’s when it’s ready to bake with!
I highly recommend that once your starter is established and strong (like a month or so in) that you take some of it and create a back up dried starter! That way you know you have some on hand for emergency situations!