
Sourdough Cranberry Walnut Bread

This sourdough cranberry walnut bread is filled with tart dried cranberries and crunchy walnuts for a delicious, easy homemade sourdough loaf.

This sourdough cranberry walnut bread is chewy, slightly tangy, and filled with dried cranberries and crunchy walnuts. It feels a little fancy but is actually so easy to make, with a beautiful golden crust and plenty of delicious flavor in every slice.
And while cranberry walnut bread might sound like something you need to buy from a fancy bakery, it’s really just a simple sourdough loaf with a few delicious extras mixed in. No complicated shaping techniques or special skills required.
It’s especially lovely for fall and holiday baking. Toast a slice and spread it with cream cheese, serve it alongside a cheese board, or turn it into some seriously amazing French toast. The recipe makes two loaves, so you can keep one and share the other.

Why you’ll love this recipe
- Sweet, tart, crunchy, and tangy. The combination of dried cranberries, walnuts and naturally fermented sourdough gives every slice a wonderful mix of flavors and textures.
- An easy way to make sourdough interesting. If you have already made a basic loaf, this is the next step! The dough is easy to work with, and the additions add plenty of flavor without requiring complicated techniques.
- Perfect for sharing. This recipe makes two loaves, so it’s a great choice for gatherings, homemade gifts, or stocking the freezer.
I love a good loaf of bread with mix-ins! Sometimes adding extra ingredients into your dough can cause issues with how it behaves and rises, but this easy loaf is perfect for beginner sourdough bakers! Like my roasted garlic sourdough and my jalapeño cheddar sourdough loaves, this recipe makes an easy to work with dough that gives great results without being fussy.
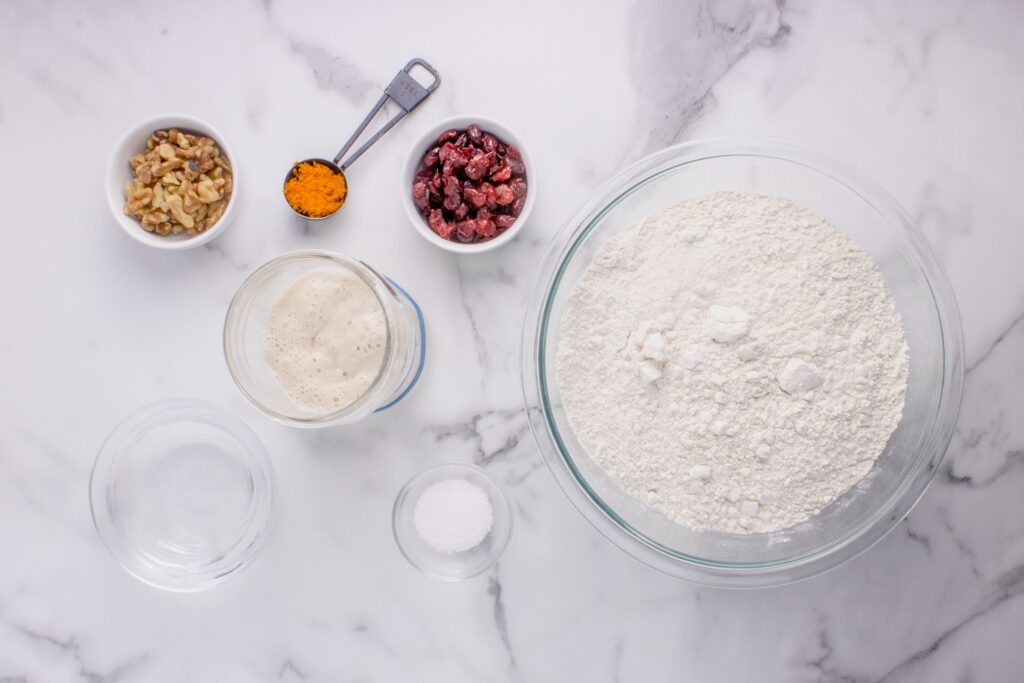
How to make this loaf
Below is a brief overview of the directions so you get a feel for the recipe before you head into the kitchen. For the complete directions, including ingredient amounts, please scroll down to the recipe card below.
Step One: Mix the dough.
Make sure you feed your starter and wait for it to become active and bubbly, and near or at its peak.
In a large bowl, combine all the ingredients (yes, all!) and mix until everything is well incorporated together. Cover the bowl and let it rest for 30 minutes.
Step Two: Stretch and folds
With slightly damp hands, grab one side of the dough and gently stretch it upward without tearing it. Fold it over the center of the dough. Rotate the bowl 90 degrees and repeat until you have worked your wall around all four “sides” of the bowl.
Cover the bowl and let the dough rest for 30 minutes.
Repeat this process for a total of 4-5 rounds of stretch and folds over approximately 2-3 hours. As the dough develops strength, it should become smoother, more elastics nd better able to hold its shape.


Step Three: Bulk fermentation
After the final stretch and fold, core the bowl and allow the dough to continue to ferment at room temperature for about 3-4 hours.
The dough is ready when it’s noticeably increased in volume, looks puffy and aerated, and has a slightly domed surface. You may notice bubbles around the edges of the bowl and a gentle wiggle when you move it. It doesn’t necessarily need to double in size.


Step Four: Divide and shape
Turn the dough out onto a lightly floured work surface and divide it into two equal portions.
Gently shape each portion into a round or oval shape, depending on the shape of your proofing baskets. Try to add little surface tension as you shape without squeezing all the air out of the dough.
Place each shaped loaf seam side up into a well floured proofing basket or a bowl lined with a clean, well floured kitchen towel.


Step Five: Final Proof
Cover the shaped loaves and let them proof at room temperature for about 1-2 hours, until the look slightly puffier and feel lighter. You can also cover the baskets and place them in the fridge for an overnight cold proof.
Step Six: Bake
Preheat oven to 450 F with a dutch oven and a lid inside. Allow at least 30 minutes of preheating so the dutch oven becomes thoroughly heated. If you are baking one loaf at a time, leave the second loaf in the fridge while you bake the first.
Carefully turn one loaf out of the proofing basket and onto a piece of parchment paper. Use a sharp knife or a bread lame to score hte top of the dough. This gives the bread a place to expand as it bakes.
Carefully transfer the dough and the parchment paper into the hot dutch oven and place the lid on.
Bake for 20 minutes. Remove the lid and continue baking for an additional 20-25 minutes, or until the crust is golden brown.
Transfer the loaf to a wire rack to cool completely. Repeat with the second loaf.


Baker’s Schedule
Knowing how long a recipe will take you is important before you start baking. This helps you know when you need to start preparing your sourdough starter, understanding how long a recipe will take, and when you can expect to be done by.
- Preparing Stater – 6 to 8 hours
- Mixing the dough – 10 minutes
- Autolyse – 30 minutes
- Stretch and folds – 2 to 3 hours
- Bulk Fermentation – 3 to 4 hours
- Shaping – 10 minutes
- Final Proof – 1 to 2 hours (or overnight in the fridge)
- Baking – 40 minutes
- Cooling – 2 hours
Remember that these timelines are guides and that the temperature and humidity of your house will affect how your sourdough starter will behave. Please watch your dough and not the clock.
From start to finish, this recipe should take you between 15 hours and 20 hours, including the time it takes your starter to become active through when the bread is fully cooled.

Sourdough is better when shared
If you try this recipe, let me know! Leave a comment and rating below.
Love and links are always appreciated! If you’d like to share this recipe, please link to the post directly for the recipe, please do not copy and paste or screenshot. Thank you so much for supporting me. XOXO – Jenni
Cranberry Walnut Sourdough Bread
Ingredients
Method
- Before starting your dough, take your mature starter and feed it with the bread flour and water.
- Let rise 6-8 hours at 75°F/24°C until doubled.
- In a large mixing bowl, combine all ingredients until fully mixed.
- Cover the bowl and let the dough rest for 30 minutes.
- Do a set of stretch and folds. Gently stretch and fold the dough, lifting one side, stretching it up, and folding it over the center. Rotate the bowl and repeat on each side until you have done all four “sides”.
- Recover the bowl.
- Perform 4-5 sets of stretch and folds over the next 2-3 hours, about evert 30-45 minutes.
- Cover the bowl with a damp towel or plastic wrap.
- Let the dough rise in a warm place for 3-4 hours, until it has noticeably expanded.
- Turn the dough onto a lightly floured surface.
- Use a bench scraper to divide the dough in half and shape each portion into a round (boule) or oval loaf.
- Place each shaped dough, seam side up, into a floured banneton basket or bowl lined with a clean towel.
- For the final rise, cover the bread dough with plastic wrap or a damp towel and let it proof for 1-2 hours, until slightly puffed. Alternatively: cover and refrigerate overnight. If refrigerated, be sure to score and then bake it straight from the fridge.
- Preheat by setting your oven temperature to 450°F (230°C). Place the Dutch oven with its lid on in the oven to preheat for at least 30 minutes.
- Carefully turn the dough onto a piece of parchment paper.
- Score the top with a sharp knife or bread lame to allow steam to escape while baking.
- Transfer the dough (on parchment paper) into the preheated Dutch oven.
- Cover and bake for 20 minutes.
- Remove the lid and bake for an additional 20-25 minutes, until your sourdough loaf is golden brown and sounds hollow when tapped.
- Repeat this process with second loaf.
- Transfer the baked loaves to a wire rack. Let them cool completely for at least 1 hour before slicing to help set the crumb.


